In Part Two of our Farmhouse Kitchen Remodel, I’m sharing how we opened up a load bearing wall to create a brighter kitchen by installing a Pass Through from the Dining Room.
This kitchen was VERY dark. Here’s a before:

I would call it grey, because it seemed like you were constantly in the shade with no direct light.

* yes, that is a life-size Captain America, to a little boy*

Look at all that natural light from the Dining Room! If we opened up this wall, then that light from the beautiful bay window could pour into this kitchen.

But here’s the problem: It’s a load bearing wall!
What does that mean? (I had to look it up.) Basically, all the weight and structural integrity of the upstairs relies on this wall.
YIKES!

This dark, dingy wall held up my house.
So I sleuthed around to see how to open it. We are avid DIY-ers, but when structure was involved, it scared me, A LOT.
So we found a Guy! He was awesome!
(and licensed)
He came out to check it out and said that if we assisted him and provided all the supplies (wood, screws, etc.) that he would only charge us half his rate. With his knowledge and our ability to be his helper, we were able to open that wall affordably with peace of mind that the top floor would not crash on top of us!

First we had to find the studs. There’s all kinds of science-y, math-y components to this (as well as the typical Stud jokes from the Hunk himself), but I won’t attempt to explain. Basically you can find the studs from the dry wall mud marks and something with the outlet placement.

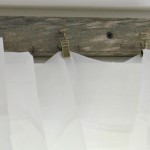
We definitely wanted to keep the dentil moulding intact, so the Guy told us to cut the drywall a foot below it.
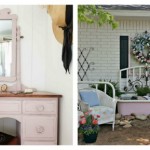
Look how peach the trim is! It matches the pink carpet, I guess.

We used an oscillating tool to open the drywall.
Be aware of any electrical wires and make sure NOT to cut them!
*Tip* Using a shop vac helps keep down on some of the dust mess.

Progress!
As you can see, we did this project while we were prepping our floors for our Hardwood Install.

We followed the same methods for the other side.
This was our sneak peek at the how the pass through would look.

Now we were ready for the Guy to come in and sure up the wall.

The Guy built a temporary wall in the dining room as well as the kitchen, to hold the structure in place so he could install a header. I’m not sure the aspects of this, so consult a professional before attempting this yourself.

Here’s the difference between the before wall without a header and the after.

Once the header was in place, we could cut the boards.
Eeee! I was so excited at this point, I did a little dance!


Finally, the Guy removed the temporary walls.
Ah! Look at that light!

He capped off the the cut boards and left us to finish the project with drywalling.

Before and After
No light and Light!

We covered the wall with drywall and got the wall ready for granite.

We got such a steal on the granite that we opted for a small bar-type feel for the pass through.


We added trim around the frame to finish it off.

Stay tuned for the final reveal of this series, where we share how it all comes together!


For more details about our Kitchen Remodel, check out these posts: