I am so excited to share my latest DIY project with you all!
Spring is in the air and it’s time to dust away the cobwebs and open the windows!
I just switched out my sofa covers to usher in that brightness that spring brings to my home and my heart.
I gave a few teasers on my Instagram feed about my Chevron covered ottoman and I’m so excited to share the reveal with y’all today.
But you gotta start with the beginning.
Oy!
Let me just say I love my ottoman. We purchased it about 10 years ago at Costco and have kept it throughout the past few cross country moves and I actually am surprised that it survived all the abuse it’s seen between those moves and my boys!
Now, I don’t know about you, but we’re a ‘snuggle on the couch with our feet propped up’ kinda family and this padded ottoman has been perfect for us for the past decade.

What I love most about my ottoman is that it has a secret!
It’s the little tray that slides out.
Eee! How cute is that? It’s light it’s my secret compartment in my spy home, only it’s just a tray.

It’s perfect for drinks when company is over or for the kids to occasionally have a snack in front of the TV without momma going into one of her fits about messing up the couch. (Especially when the slipcovers are white!)
So while it survived the abuse it’s received, we noticed after our last cross-country move that the ottoman has sadly seen better days.

The leather was starting to wear and the piping was pulling away.
When this huge rip happened, I knew it was time to recover it.

The top easily came right off after removing the screws, leaving the leather base that held the tray and the legs. Updating the top was a cinch. I removed the old leather, added some padding and batting I had left over from some sound panels we made for our music room, and I was able to staple it all together.
I opted not to tuft the top, since my boys still like to pick at things!
And I’ll be honest, it seemed a bit daunting,

I painted the legs white and added Valspar antiquing glaze
to bring out the character of the spiral twists.
How cute!

The top was easy, but covering that leather base that was detached from the top was tricky and I just could not figure out what to do with it.
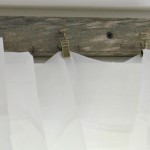
I had some leftover burlap ribbon from Christmas and simply wrapped and stapled the ribbon around the leather base.

I added some braided jute where the base and top met. I used liquid nails and attached it to the fabric and top of the burlap wrapped base.

I painted the pull out tray with the same paint and glaze technique I used for the legs.

I absolutely love how the burlap and Chevron look together, but to be perfectly honest, I am expecting to have to replace the burlap at some point.
I imagine it won’t last long with my pick-at-things boys.

I love how it looks and was amazed with how easy it was to do.

This is how it looked with our gray ektorp slip covers.
But I absolutely swoon with how it pops against the white covers!


You might enjoy these links: