Thank you to the wonderful people from Rockler for partnering with me on our Master Bedroom makeover!
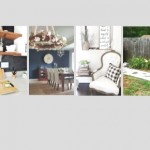
Here we are in Week 4 of the One Room Challenge hosted by Calling it Home, and I am so excited to share this week’s big reveal with you! We’ve been making progress on our His and Her closets, but this week is all about our DIY Barn Door and how easy it is to convert a builder grade door into a sliding barn door.
For this One Room Challenge, I wanted to make our Master bedroom match the rest of our Almost Farmhouse and I knew that adding a barn door would be so cool. And when we added the new door for my husband’s closet conversion, all I could see was the same 3 doors lined up. By switching out the door to our bathroom for a DIY Barn Door, it would break up the monotony. Bonus – it’s a super easy DIY!
Ready to see how we did it? Here’s what you need to make your own.
DIY Barn Door Supplies
- 6 – 1 x 6 x 8 boards
- 1 – 1 x 6 x 6 board
- 2 – 1 x 4 x 8 board
- Minwax Wood Stain, Weathered Oak
- Minwax Wood Stain, Dark Walnut
- Antiquing glaze
- Rockler Rolling Barn Door Hardware Kit
- Door Handle (like this one: Barn Door Pulls in Black
)
- Pneumatic nail gun, or screws if you don’t own a nail gun
- Stud finder
- Drill
- Saw

First I distressed the boards. I used nails, planers, a hammer, chain, my anger and frustrations – whatever I could to ding up the boards to make them look old and beat up. There’s no rhyme or reason to it, and you can’t mess it up – just whack away at those boards to add the weathered look.

First, I stained the inside that would face the bathroom with Dark Walnut, and I started the other side that we would see everyday with Minwax Weathered Oak stain, but after the first two coats, it was too light for the look I was hoping for, so I just used a custom mix of the weathered oak stain with a little bit of Dark Walnut and it was a perfect mix.
After it dried, I finished each board with the Antiquing Glaze focusing on all the distressed marks to help those stand out.

The Rolling Barn Door kit came with short brackets to hang the door, but I originally planned on hanging the rolling bar directly on my wall, which meant we needed the long brackets to clear the door frame, so I ordered the longer brackets, which are sold separately.
But then, this happened.

See all those tiny holes? See that ginormous space between those holes?
That’s where the studs are – and notice there aren’t any studs over the door.
(sad trombone)
We were concerned that the span between the studs wouldn’t hold the weight of the door. It baffles my mind that there isn’t a stud in the header, and I was so upset that I couldn’t go with my original plan. So, Plan B was quickly concocted and I had to use a board that I was going to use for the closet as a mounting bracket for this door. So I had to go back to the staining table, but opted not to distress this board.

After I stained it to match the door, we attached it to the studs.
Rock n Roll! Now we felt it was secure enough to hold the weight of the door, so we installed the sliding bar.
And don’t be like Jenny. Jenny didn’t read the instructions closely and Jenny had to redo her mistakes. Be smart – read all the instructions first.


Iit turns out that I actually love how it looks! Happy dance! It was DIY Barn Door time and we removed the old builder door.
The reason why you don’t build the barn door first is because it needs to be the correct measurement from the sliding bar to the floor.

We laid the boards out how we wanted them to look, and then cut the pieces to the correct measurement. Our door is 33 inches wide and 87 inches tall.
Here is a breakdown of the sizes on each board.

Now here’s where another surprise happened. I wanted the boards to be attached with screws, but we realized that the screws we got were too long and would poke through the other side. Then Trent had a genius idea. He was using our pneumatic nail gun for his bench in His closet and we thought we would try it on our door.
It worked! And no trip to the hardware store was needed!
No screws, no glue, just pop, pop, pop of the nailgun and it was super secure.

Using the template that came with the barn door kit, we added the roller straps to the door and hung it in place.
It was so simple!

Next we installed the floor hardware – the door stops and guide track. This keeps the door from swinging out.
I have to be honest and say that it hurt my feelings a bit drilling holes into our new Hardwood Floors that we worked so hard on, but it is so necessary to have those in stops and guides in place and once we were finished – I quickly forgot about those tiny screws in my floor!


The last thing we had to install were the door handles. Again, the screws were too deep to accommodate the handle we picked out, so we added a piece of wood as a fix. For the back of the door, we went rustic and screwed a piece from the wood scraps.


I still have such ups to do, but I love the two-toned door with the darker stain on the closed door. It makes it look like one side is sun bleached and the other side is untouched.


I just love my DIY Barn Door and I can’t get over how easy it was converting my old bathroom door into this beauty!
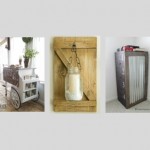
And the closets – – oh the closets.
We continue to make progress and have finally started one side of my She Chic closet. Alas, there is a lot of painting in my near future.

And I am slightly losing my mind that all the things that were in their neat little spaces are all over my bedroom, but I take a deep breath and know that they will be put back away in even prettier little spaces!


So let’s check out the updated to do!
The One Room Challenge Plan
- Converting the 1/2 bath into a closet
Opening the Wall and adding a doorSealing the other Wall- Replacing the flooring – Still have to poly
- Build a DIY closet system with a bench – bench is built
- Adding a mirror – in process
- Moving the light
- Glitzing up and feminizing the existing walk-in closet – in process
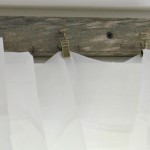
Replace the bathroom door with a DIY barn doorHang woven shades in windowsReplace curtainsModify the ceiling fan into a Farmhouse style fan- Replace the lamps – purchased
- Find new side tables – switched out from other rooms
Paint the existing dresser(I’ve decided I’m leaving it black for now)- Adding a reading nook so I have a quiet place to escape to
- Create DIY artwork
AHH!! Still so much to do and I’m starting to panic. This weekend is shot because my husband and I are helping out with a local school musical. Lots of late nights ahead.
Be sure to follow along to see what we get accomplished in the next week! And head over to Linda’s site, Calling It Home, to see all the other amazing rooms being transformed.
To see our design plans for this room, check out my previous posts:
week one, week two, week three

I’d love to hear from you! Scroll down to the bottom of this post to leave me a comment.
Or find me on your favorite social media and tell me there!
{Instagram} {Facebook} {Twitter} {Pinterest} {Google +}
I share with these wonderful people.