Psst…. hey you! Looking for a Simple Furniture DIY?
Yeah, you with the garage full of furniture finds that you’ve been waiting for an easy project to come along. Have I got news for you! This simple furniture DIY just may take your breath away!
Here’s an easy way to transform your furniture in no time with little effort.
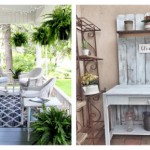
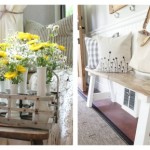
If you remember, I shared with you all how I ‘shopped my home‘ looking for new side tables for my Master Bedroom Makeover. This little chest was a piece I found at a garage sale for $50 and it was in my boys room for years as you can see in this grainy pic – you may have to squint your eyes a bit and tilt your head just so, but this was the plain old chest from way back when complete with white ceramic knobs.

We moved it into our master and it was if it sighed like it was home. I just loved how it looked, but thought it needed some sort of secret sauce to fix it up for it’s new space. So we took the chest out in the garage and honestly, just played around with it.
I think that’s the technical tutorial term for it. Here’s how easy it is and the sources I used. Affiliate links are provided for your convenience. You can read my full disclosure here.

Simple Furniture DIY Materials
- Paint – we used Peppercorn from Sherwin Williams
- Antiquing glaze from Valspar
- Chalkboard spray paint for the knobs
- Paint brush and materials
Confession time: We had a paint brush sitting there to clean from painting our closet addition in our Master Bedroom Makeover, so instead of cleaning it, we used it to dry brush the edges of the chest.
Oh my, I was swooning!

I was loving how it looked, but thought it needed just a bit more depth, so I darkened it using Valspar Antiquing Glaze.
Again, we were winging it and playing around with ideas and just went for it.

We randomly added the glaze.
A touch here…. a bit more there.
It’s like you have to channel your inner Bob Ross, step back often and find where to put your ‘happy little tree’. Here’s a side by side so you can see how different the glaze makes to the piece.

I added it where I thought years of hands would have touched the piece. And covering a few spots of the painted edges darkened the hue as well.
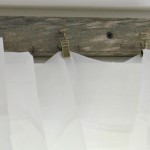
And for the knobs, we took the ceramic ones that were on the piece and spray painted them.

That’s it!
Sooooooo simple and soooooo quick.
And in true Bob Ross fashion, our simple furniture DIY was done in 30 minutes!

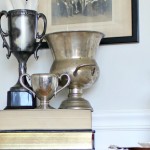
The top was already marred from the previous owner and a very wet plant that sat on it for a long time. I did add touches of the glaze to the corners of the piece to match that beautiful stain.


And can I confess something else? Of all the elements and DIYs we made for the Master Bedroom Makeover, this simple furniture DIY just might be my very favorite!
The quickest and easiest DIY takes the lead over the sweat inducing, back breaking projects.
Isn’t life funny like that?
So, go out there and tackle your project! It may surprise you and not be a huge makeover. And who knows… it may turn out to be your very favorite too! And don’t forget to share with me your furniture makeovers – I’d love to see them!