The eyesore of a door is no more!
Don’t you just love rhyming words? Welcome to week 2 of the One Room Challenge® hosted by sweet Linda from Calling it Home. Last week, I shared with you our plans to make over our master and convert an unused bathroom space into a second closet for our bedroom, but what I didn’t share was that we had already done a teeny bit of work to this room. EEK!
I participated in a Spring Home blog hop a few weeks ago, and it was killing me that my main room would have an ugly door right in the middle of my wall. Knowing that we were going to be tackling the room behind the door for our project for the One Room Challenge®, I sweet talked my husband into closing up the wall and opening to the other side, so that my home would look beautiful for the blog hop.

Other than opening up and closing that door, that is all that we did in this room, but it wasn’t just as easy as that.

Not only did we have to cut the existing wall to open to the master, but we also had to move the electricity over a stud to make room for the new door. But look how happy I was to have that wall open! (and so was Ollie!)

So it only took a weekend, but we removed the framing, opened up the opposite wall, moved an electrical outlet, framed the new wall, and hung drywall and rehung the door. And look at the space!!

Then I made sure the wall looked pretty for the Spring Home Blog Tour with a bit of mud and paint.


But this is what our wall in our master looked like on the other side for weeks.

But now I’m so excited that it’s time to demo the 1/2 bath! WOO HOO!
The toilet was removed about a year ago when it was leaking. We knew we had plans for this room, so we just removed it without replacing it and temporarily covered the drain hole.
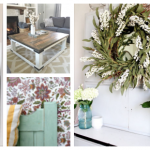
And last fall, when we made over our Laundry Room for the One Room Challenge®, we removed the old sink base and repurposed it into a folding table with a custom topper made from old wood. You can see that here:

But back to the ugly – this is what we are starting with:

YIKES! First thing on our to do was to call the plumber. The water line to the toilet needed to be cut and soldered, and the sewage pipe needed to be capped off in the crawl space. He also capped off the water lines and drain from where the old sink was.
After he left, we started ripping up that tile. It was pretty easy. I don’t know if tile can dry rot, but the floor crackled when you walked on it, so it was already starting to detach from the cement board underneath.


When we had our hardwoods installed, we had lots of scrap pieces we were left with that we’ve been saving for this room. Like I said, we’ve had plans for this little space for a loooong time! We followed the same steps that we did for the hardwood installers, but this time, we will be installing the hardwood floor ourselves, which intimidates me. Here’s how we prepped the floors.
First we installed a vapor barrier over the existing subfloors. The gray you see is the remnant of the cement board that was under the tile.


Next we installed a second layer of plywood flooring to meet the level of our existing hardwoods. Plus, it gives us an even surface covering the rough texture left behind from where the tile and cement board was.

Now it’s ready for us to install the hardwoods. It kinda freaks me out a bit doing this ourselves, but the space is only 4 ft x 7 ft, so I think we can handle that small of a feat.
We’ve already installed the first few boards in the threshold!


The One Room Challenge Plan
- Converting the 1/2 bath into a closet
Opening the Wall and adding a doorSealing the other Wall- Replacing the flooring – in process
- Build a DIY closet system with a bench
- Adding a mirror
- Moving the light
- Glitzing up and feminizing the existing walk-in closet – in process
- Replace the bathroom door with a DIY barn door
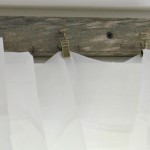
- Hang woven shades in windows
- Replace curtains
- Modify the ceiling fan into a Farmhouse style fan – in process
- Replace the lamps
- Find new side tables
- Paint the existing dresser (I’m still undecided about this)
- Adding a reading nook so I have a quiet place to escape to
- Create DIY artwork
As you can see, not much was crossed off the list this week, but big steps were taken. We have quite the workload ahead of us, but I feel confident that we can get this finished in time. Be sure to follow along to see what we’ve accomplished in next week! And head over to Linda’s site, Calling It Home, to see all the other amazing rooms being transformed.

I’d love to hear from you! Scroll down to the bottom of this post to leave me a comment.
Or find me on your favorite social media and tell me there!
{Instagram} {Facebook} {Twitter} {Pinterest} {Google +}
I share with these wonderful people.