I just returned from my 3 week trip to the UK and Ireland on Saturday night and, while it was wonderful to go adventuring, I’m really happy to be home.
There are a lot of food related differences between here and there. What we call french fries are there called “chips” and what we call chips, they call “crisps”. Not too hard to get used to. Other things that surprised me were: “bacon” is more a very thin ham steak, while ham steak is “gammon”; the breakfast sausage is a much finer grind than I’m used to; and a “full breakfast” includes beans and grilled tomatoes. Also, pancakes are dessert (which, frankly, I sort of agree with, especially when they’re drowned in butter and syrup) (which, frankly, is what makes them totally delicious, IMO).
Don’t get me wrong; I had some really amazing meals there, from home-cooked pork (thanks, Jim’s family!) to street noodles (thanks, Wok2Go!) But as soon as we got back to Cali, we ordered our favorite pizza and ate really a lot too much.
One thing I missed while I was gone was cooking. I’m not really a ‘foodie’, per se; for me, the preparing of food is often more about the process. I like to learn why things do what they do, and why the directions say that the butter should be at room temp before adding it to the sugar. The more we understand the underlying principles, the freer we can be with our creativity and I like to take a recipe and make it interesting and special by a little bit of tweaking here and there.
So as soon as I had the time and the space, I mixed up one of my easy favorite dishes: hummus. I love homemade hummus because a) it’s a great healthy snack, b) it is profoundly uncomplicated, and c) most importantly, it’s really, really tasty.
Here’s how I do it:
What ya need: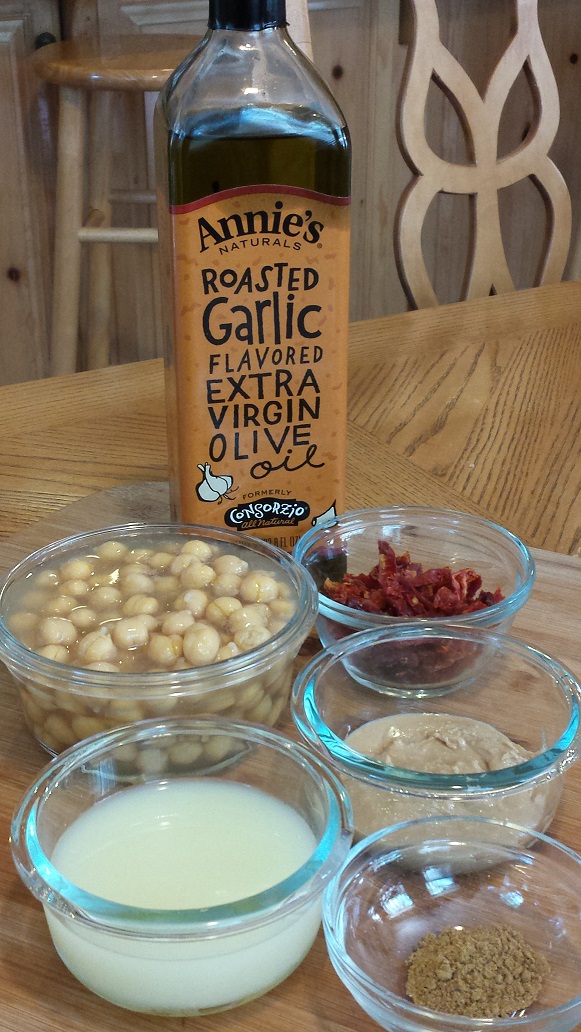
2 cups of Garbanzo Beans*
I used a 15.5 oz can this time, because I had no dried ones and also because I wanted to eat it NOW instead of waiting for beans to soak and cook!
1/2 cup of Lemon Juice
AKA the juice of 2 or 3 lemons
1 or 2 tablespoons of Minced Garlic
Personally, I like to buy pre-minced garlic. Some folks don’t mind the garlic-fingers effect, but I’m not a huge fan. Of course, it’s even better if you have someone who will peel and mince the garlic for you right when ya need it.
1 teaspoon of Cumin
3 tablespoons of Tahini
2 or 3 tablespoons of Olive Oil
Salt
I also used in this batch a couple handfuls of Sun-dried Tomatoes because they were there.
And some Pico Pica Taco Sauce, maybe 2 or 3 tablespoons
First I tried the “August in Austin” hot sauce we bought on our last trip to TX, but one drop of that stuff had me literally walking around the house with my tongue hanging out for 15 minutes.
What ya do:
Just put all that stuff in the blender (Vitamix lovers unite!) and let it spin until it’s the right consistency.
Give it a taste and see what else it needs. If it’s not right, but you’re not sure why, try a pinch or two more of salt. Spin it up and try it. Still not right? Add another splash of lemon. Still not perfect? Add more garlic, or more hot sauce!
Other possibilities to make it more interesting include:
Olives – Pureed with the beans if you want them to disappear, otherwise cut them up and mix in when you’re done with the blending.
Salsa – Onion-y and tomato-y deliciousness
Cilantro
Artichoke Hearts
Lime
Plain Yogurt
Saw a recipe today for Hummus with Peanut Butter…somebody try that and let me know how it is!
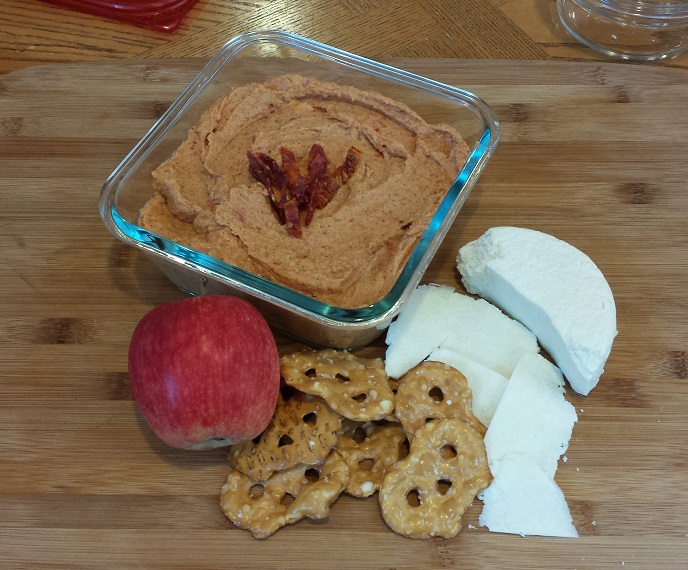
Now, smear it on bread instead of mayonnaise, dip your chips, vegetables, pita bread, crackers, whatever else, in it and enjoy!
So, today I got to play in the kitchen, eat one of my favorite snacks, settle in more to my home-place. A good day.
*If you use dried Garbanzo Beans, you’ll need to either soak them overnight, or boil them for 5 minutes or so, then let them sit for a couple of hours. Either way, the next step is to drain them, add new water, bring to a boil, cover and simmer for between 1 and 3 hours, depending on how old your beans are! Salt them after they’re cooked.