Back in 2009 stories of witch bottles began to show up in the American and British press. I had heard of witch bottles before that, most likely in Raymond Buckland’s Complete Book of Witchcraft, but to see them being written about in the mainstream media was kind of exciting. Magic has always been a part of popular culture, and an influential one, but it often ends up on the cutting room floor of written history.
Despite the title of “witch bottle” the jars in question were generally used against witchery and witchcraft. The idea behind the bottles was to fill them up with nasty things (pins, needles, nails), add something identifying the one casting the spell (fingernails, toenails, blood), top it off with some pee and you were ready to go. The idea was to simulate the bladder of the “witch” and cause harm to that witch. Often times the bottle or urine were boiled for maximum hurt. In a 19th Century case a Londoner boiled a witch bottle over a fire and claimed to hear the voice of the witch who was tormenting him “and that she Screimed out as if she were Murdered.” (1) Most cases weren’t quite so dramatic, though people did swear by the bottle’s efficiency.
Even if witch bottles were used against alleged witches they were most certainly a common magical implement. The first documented use of a witch bottle dates back to the 17th Century, and they’ve been in use ever since. Though they don’t turn up all that often in the archeological record witch bottles were most likely common place in the United States and Britain until the start of World War One. It’s likely that over the years a great many unearthed witch bottles were simply mistaken for trash and ignored or discarded. Sometimes people just don’t know what they are looking at.
In addition to using witch bottles against specific threats they were also used to protect the homestead. Bottles of nails, urine, and other materials were often buried under the hearth, porch, or front door. There the bottles would quietly go about their work, protecting all of the inhabitants inside against negativity and dark magics. In the United States the practice of using witch bottles was adopted by a diverse range of magical practitioners. By the 19th Century the bottles were being used in conjure and hoodoo. When something works people adopt it, no matter its origins.
This past weekend my coven created our own witch bottles, taking inspiration from traditional sources while adding our own modern slant to the proceedings. Besides, our witch bottles weren’t directed at any specific individuals and were created to simply keep negative energy away. (I like to abide by the Wiccan Rede.) Even though our witch bottles were strictly defensive the chants we used during their creation still felt a little aggressive. Traditional English cunning-craft isn’t all sunshines and rainbows, neither is Witchcraft, it’s good to be reminded of that sometimes.
To make a witch bottle you’ll need either a jar or a bottle. Mason jars work well, but you can use a spaghetti sauce jar or a wine bottle; whatever you want. Word of warning though, the narrower the opening the more difficult making your bottle might be (especially towards the end). We created our bottles in four easy steps, though if you want to repeat our version of the spell you can add or subtract a few depending on your circumstances.
 Step One: Items to pierce and cut.
Materials you can use: nails, screws, pins, razorblades, bottle-caps (the rustier the better for all of these)
When I was creating my bottle I envisioned all of these nasty little things cutting and slicing up any negative that tried to make its way through my front doors. Often times people will use a specific number of pins, nails, etc., because it has a magical meaning for them. (In the 19th Century the number nine comes up a lot, but don’t let tradition dictate what you do, do what makes sense to you!) I simply trusted my hands to pick the right number of nails and razorblades, putting only those that “felt right” into my jar. Once the coven had picked out all of their pointy objects and deposited them into jars we held our bottles and recited the following chant:
Sharp and pointy
Metal and mighty
No one shall hex or curse
So says this witches verse
We repeated this chant six times because I like to do things in increments of three while picturing bad things stepping on bottle-caps and getting pricked by needles.
Step Two: Edibles to cause thirst, burning, and blistering. (Yeah, I took a long shower after this ritual, and I wrote it.)
Materials you can use: Spicy food (hot peppers, ginger), salt, vinegar, spoiled wine, stuff you personally don’t like.
Let’s say that cutting out darkness isn’t quite enough, maybe you want to burn it out? Since it would be hard to stuff an ever-burning flame into a bottle hot peppers are an easy alternative. For our ritual we used red pepper. In order to be a little more aggressive we also added some salt, making anyone who would wish us harm eternally thirsty, or at least thirsty once they dared to cross over our witch bottles! To that end we also added vinegar. Once all of the materials we wanted were in our jars we chanted once again, focusing on the intent of the new ingredients added to our jars.
Blister, thirst, and burn
To this spell we turn
Taste failure taste despair
So says this witches prayer
Step Three: Silver dimes for deflection
Materials: dime coins (10 cent pieces for those of you outside of the US and Canada)
 While reading Owen Davie’s America Bewitched: Withcraft After Salem I came across a bit about silver dimes and conjure in the American South. In order to repel negative spells people used to wear charms made out of dimes around their ankles, dimes because they were once made out of silver. I thought that would make a great addition to our witch bottles so we added dimes for our third step. In my mind’s eye I pictured any negativity directed my way bouncing off of the dime in the bottle. I held that image in my mind during our third chant of the night:
Silver dime protect me from harm
Be a part of this witches charm
Step Four: A piece of yourself
Materials: hair, nail clipping, blood, urine, spit
Before the spell is complete the owner of the bottle has to mark their property. Urine was very common a few centuries ago, with toenails and fingernails coming in a close second. (In my bottle I used a finger nail, a few strands of hair, toenails, and some urine.) The important thing is to make sure the bottle and its contents know who to keep safe from harm, and the easiest way to do that is with something directly from the body. If the idea of nails, spit, and blood is too much, you could always simply write your name on a piece of paper and add it to the jar, but since names have power, you might be taking an unnecessary risk. Just spit into it when no one’s looking. Before finishing up this step be sure to top of your witch bottle if it needs a little extra liquid. In addition to vinegar or wine here, you can also used salted water, nothing drives away negativity better. During our ritual we ended with this bit of magic and the following chant:
I give this bottle a bit of me
From evil and darkness free
Witch bottle I have conjured thee
The spell is now cast so mote it be!
Step Five: Sealing the bottle
Materials: Wax, ribbon, tape
Due to time and space constraints we skipped this part in our ritual, but sealing up a witch bottle is a nice little extra step. The easiest “seal” is to simply tie a ribbon around the bottle somewhere. A bit more involved would be to make a wax seal. If you’re out of ribbons or wax duct tape would work here too. The whole point of a witch bottle is that it can be made out of easily available ingredients in the home. Nothing is right or wrong. Had we used this step during our ritual we would have chanted the following:
I seal this bottle whole and well
Now I finish this witch’s spell!
 Step Six: Bury the witch bottle
Materials: Shovel
When your witch bottle is ready for use all you have to do is bury it. It’s best to bury it near the entrance to the home, or if you are really ambitious, under your fireplace. Mine ended up right in front of my back door, the door that leads to my office and the place I write everything for RtH. My chants are never very good, but they do always rhyme. As I was tossing dirt over my jelly-jar witch bottle I recited the following words several times:
I bury this bottle deep in the ground
Now this witch shall sleep safe and sound!
Now my office is even more protected from negativity than it’s ever been! Trollish commenters you’ve been warned! (Kidding, mostly.)
Over the years people have other various things to witch bottles. Four Thieves Oil is a common ingredient, as are materials from graveyards. When we were done with our ritual one of my coven-mates (Angus, who writes Ask Angus here at Patheos Pagan-come on, ask him something!) asked if we wanted him to bring the coffin nails and graveyard dirt with him the next time we make witch bottles. Whatever you use, just make sure it makes sense to you!
1. Popular Magic: Cunning-Folk in English History by Owen Davies, Hambeldon Continuum 2003, page 108.
Photos:
1. A witch!
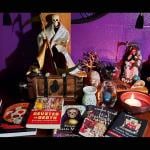
2. The materials table during our ritual.
3. My witch bottle (or jar in this case). If you look closely you’ll see some nail clippings in there. Gross! I know.
4. Burying the bottle.