I don’t write about makeup much on here, but really, I love it. When I was in high school I told my grandparents I wanted to become a makeup artist. To which they replied, “Over our dead bodies. You’re going to college. If you want to become a makeup artist, you can do that after you go to college.”
I was pretty annoyed at the time, but in retrospect, it was good advice.
Anyway, I really like makeup. I like trying new makeup on myself; I like helping friends find things that are flattering and fun.
Summer can be a hard time for makeup, especially when it gets so hot, like it is now, especially in the Midwest. Who wants to wear a full face of makeup when it’s 90 degrees outside? No one.
So I’m going to share the 5 minute routine I use in the mornings for a quick summer makeup look that is minimal, polished, and put together. I’ll share products that are similar in two price ranges — lets call them “drug store” and “Sephora”. I love a trip to Sephora to look around and try fun things as much as the next girl, but there is no way I am spending 25$ for blush. That said, in case any of you ladies are just rolling in money, I’ve included a few higher end products.
However, the one makeup item that I’d recommend spending a little extra on is foundation. Cheap foundation (and I’m talking here under 10$) looks cheap. The materials aren’t as high quality, so it tends to cake, or flake, or look like a mask more than even a slightly higher priced foundation.
Anyway, if you hate makeup or think I’m being shallow, I guess you can stop reading here (if you haven’t already!). You can’t win them all. For everyone else, here’s the 5 minute summer face!
Step 1: Foundation
In the summer (and all year round if you’re a “less is more” kind of lady) tinted moisturizer is where it’s at. It typically has SPF added (15 or up is good) and is basically a facial moisturizer with some added color for very light, sheer, dewy coverage. It’s magical!
Just about every makeup line makes a tinted moisturizer. I haven’t tried them all, but of the ones I have tried, I’d recommend the following:
Mary Kay Tinted Moisturizer with SPF 20 – 18$
This is the TM that I use, and trust me, a little dab does the trick. The last tube I bought lasted me about six months or so. (I think any lotion with SPF has a definite expiration date, and probably shouldn’t be used after six months anyway.)
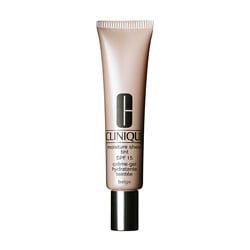
Clinique Moisture Sheer Tints SPF 15 — 25$
I have only used a trial size of this product that comes with the “free gift with purchase”, but it felt very lightweight, went on clean and did not feel greasy at all. It has very good reviews online as well.
Step 2: Concealer
Concealer is one of those things that not everyone needs. If you have under eye circles (like I do) then you know that you need it. If you have perfect skin with no blotches, imperfections, and you never break out…then you can go away. We don’t like your kind here. All kidding aside, if you are someone who usually doesn’t need concealer, then don’t go out and buy it. But if you could benefit from looking well-rested (even if you aren’t) then these are two worth trying:
1. Almay Line Smoothing Under-eye Concealer — 10$
This concealer is best for dry skin, and should only really be used under the eyes. But it goes on great, neutralizes dark circles, and lasts all day.
2. Mary Kay Facial Highlighting Pen — 18$
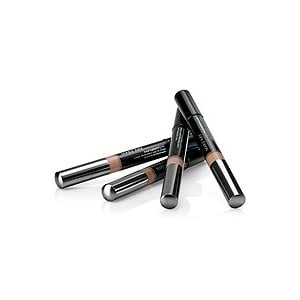 This is a “concealer” that doesn’t so much conceal imperfections as use illuminating pigments to draw attention to shadowy parts of the face that make us look tired. It’s great for under eye area, but can also be used anywhere on the face.
3. Blush/Bronzer
Blush and bronzer are two sides of the same coin. Both are intended to make your skin look healthy and glowing. Both can be beautiful; both can be very tricky.
I do not wear bronzer, usually. Since I am so pale, all but the lightest of touches makes my face look dirty rather than sun-kissed. However, blush is a girl’s best friend, and on many a day is what stands between looking like a healthy, well-rested woman and Morticia Addams. Some women wear both bronzer and blush at the same time. I don’t usually, though I may if I’m going out and have more than five minutes.
Blush: A good cream blush makes for easy summer application. If it is a color with a little shimmer, it can double for eye or lip color in a pinch, saving even more time!
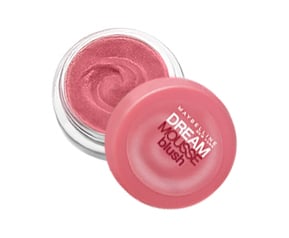
1. Maybelline Dream Mousse Blush – 6$
This blush comes in several colors, is super lightweight, and requires only fingertips for easy application. It’s a great budget blush!
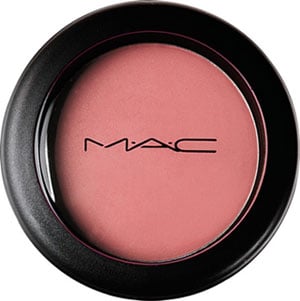
2. MAC BlushCreme – 18$
This blush (the shade LadyBlush looks beautiful on pale skin!) makes your skin dewy, soft looking, and blends beautifully. It can be applied with fingertips or a sponge.
With any cream blush, please use a conservative touch! It’s easier to add more than it is to wash it off and start over. Trust me, I have learned the hard way.
Bronzer:
1. NARS the Multiple in South Beach –see below.
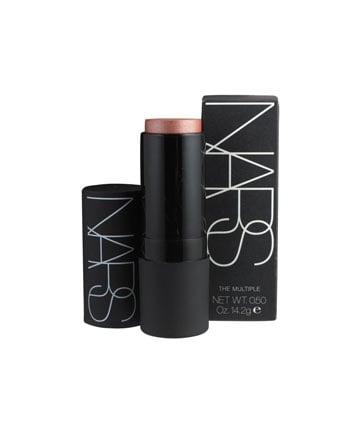 I’m listing the Multiple as a bronzer, but it is a delightful multi(haha!) purpose cream stick that, depending on the color bought, can be used as highlighter, blush, bronzer, or eye color (or all of the above!).
South beach is a good bronzer color — though with light skinned ladies, a super-light touch is all you need. Copacabana is a great highlighter and eye color, and orgasm (gasp!) is a wonderful blush and eye color.
The Multiple is absurdly expensive. I eyed this thing for years without once being willing to shell out 38$ for one. But you don’t have to. If your heart is set on this product, which *is* wonderful, then here’s what you do: wait until the month before Christmas when they come out with a “travel size” set of three multiples (one in South beach, one in Orgasm, one in Copacabana — their three most popular colors). The set of three are each half the size of a regular stick, and it costs 40$ for the set. Keep the one you want the most, and give the other two as Christmas gifts. That’s less than 15$ for one Multiple — and the travel size is more than enough to last for a year. Voila!
Mascara
To the untrained eye (aka my husband) mascara seems intimidating. It’s not. Once every teenage girl gets that first good eye poke out of her system, then we learn how to treat mascara with the respect it deserves and move on.
If you sweat a lot, or are pregnant and weepy, perhaps consider a waterproof mascara. Otherwise a regular formula will do just fine. Mascara is one cosmetic item that you do not need to spend a lot of money on to get something good. So both of the ones I’ve listed that I love are under 10$, because I will never spend more than 10$ for mascara. Also, unless you’re Elizabeth Taylor, you only ever need one coat of mascara during the day.
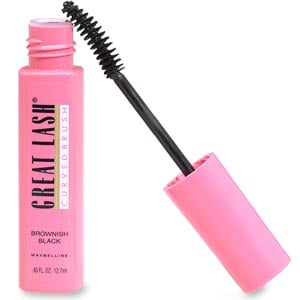
1. Maybelline Great Lash in Black — 5$
This is the quintessential black mascara. It’s been around forever, and it gets the job done. An oldie and a goodie. I prefer the curved brush, which is the same price.
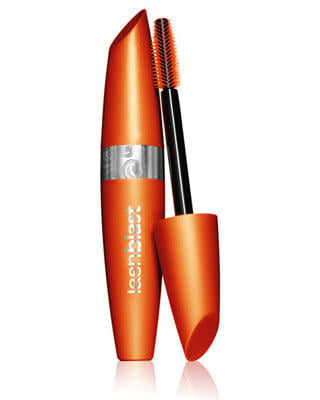
2. Cover Girl Lash Blast Mascara — 8$
I love the brush on this mascara. It looks crazy, but man does it work! The way to perfect application of this guy is to wiggle the brush back and forth while going through the eyelashes.
Lipgloss
Who can take the sunrise, and sprinkle it with dew? Cover it with chocolate and a miracle or two? Lipgloss can. It really can. I started with Bonne Belle in 7th grade and I have never looked back. You can search my purse at any given time and you will find at least two lip glosses in it.
If you’re feeling like you look dowdy or tired, a dab of shiny gloss is sure to help. The only downside of lip gloss is its tendency to be too sticky, or sometimes too drying. The following two don’t seem to be either.
1. Cover Girl WetSlicks Fruit Spritzers — $5.50
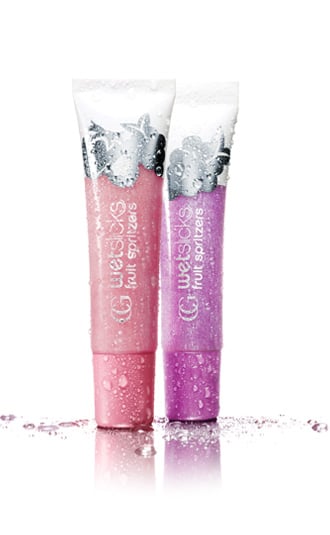 This lip gloss makes me excited about summer; with colors like Raspberry or Watermelon Splash, what’s not to be excited about? The colors do not have tacky glitter, but a nice subtle shine. Great bargain!
2. Mary Kay Nourishine Lip Gloss — 13$
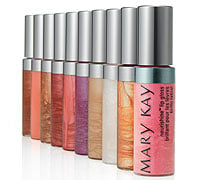 I love, love Mary Kay lip gloss. It’s infused with what they call “Nourishine”. I don’t know exactly what it is, and I don’t really care either, other than that it makes my lips feel great and not sticky or dried out when I wear it.
I have this gloss in several colors, and what I like about it is that they have both gloss with and without any glitter. So you can choose whether you want a subtle or more dramatic shine.
There you have it ladies, the five minute summer face! I hope this hasn’t bored you to tears. What are your favorite summertime makeup products?
Disclaimer: I’m not getting paid by anyone to plug these products; they are just products I’ve enjoyed using. However, I can get you hooked up with any of the Mary Kay products if you’re interested in trying them!


