![]()
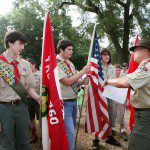
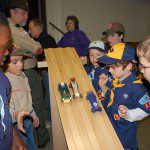
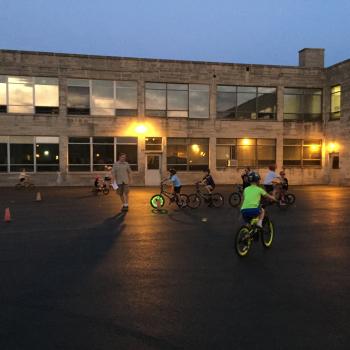
No, those aren’t “my” Cub Scouts; these are just generic public-domain Cub Scouts. I didn’t take any pictures, let alone any from-the-back pictures of tonight’s meeting. But for what it’s worth, I thought I’d share with you what I was up to.
I titled this post, my last “planned” pack meeting, and by that I mean that I’m leaving my Commtitee Chair duties behind at the end of the school year, as my youngest is now a Boy Scout. In April, our meeting will be a food drive, by splitting up into small groups and going around the neighborhood (with a reschedule if the weather cooperates), and in May, we’ll be at the Lego Discovery Center, so this is the last meeting where I had to figure out an interesting activity to do. What we did: “kitchen science” experiments, with four stations which the boys rotated among.
Now, as it turns out, it was something of a bust of a meeting, attendance-wise, since there was a conflict with another school event and the pack is smaller with the 5th grade Webelos having crossed over anyway. But that probably helped lessen the chaos that otherwise was at risk of ensuing. Instead of having 4 den-sized groups rotating, and disorder when the activities don’t all exactly take the same length of time, we had more flexibility, with 3 very small groups and, since this took place in the gym, some splitting off and playing with the basketballs and getting corralled back in later, which would have been much more of a mess were there more boys. The activities also, in total, took less than the planned hour, so there was a bit of ball-throwing-around at the end, and clean-up occurred prior to, rather than after, the official end time. So I offer this mostly as some ideas with a heavy dose of “your mileage may vary.”
What follows is pretty much what I typed up as instructions for each station, for the parent-volunteers at each station to have as reference, in addition to my quick explanation of what was to happen. The activities came from Super Science Concoctions by Jill Frankel Hauser, which I picked up when my oldest was in elementary school and has a lot of really nice activities for that age group, which I had forgotten about. Most of them, however, can’t be done in the duration of a pack meeting.
Station 1:
Un-Mixed Mix-up: mixed food colors un-mix themselves with water.
Materials:
1 baking sheet with sides or other tray (to contain spills)
Food coloring (for both activities)
Aluminum foil piece
Tall glass
Paper towel strip
Pencil
Paper clip
Dropper/toothpick
Process:
Place one drop of each food coloring together on a piece of aluminum foil. Using the dropper, place a small drop of the mixed colors onto one end of the paper towel, about 1 inch up. Add about ½ inch of water to the cup. Use the pencil and the paper clip to hold up the paper towel strip in the glass, so that it dangles and touches the water.
Ask the kids what they think will happen.
The water will travel through the paper towel and carry the dye along with it. The pigment molecules from the different colors are different, and travel at different speeds, so that the mixed colors will become un-mixed.
Try with each of 2 kinds of paper towels to see the difference.
It will take a little while to see the results, so start on the next demonstration.
Molecules in motion: dropping food coloring into water to demonstrate molecules moving
Needed:
2 clear plastic cups or glasses – one with cold, one with very hot water (just-microwaved?)
Drop 1 drop of food coloring into each. (Or have boys do so.) Ask the boys to predict which glass will have the food coloring spread out faster.
Why does the food coloring spread out? Because molecules are always moving. Why is this faster in the hot water? Because molecules move faster when hot.
Note: works best with very hot (e.g., microwaved) water.
Commentary: turns out, the school kitchen, which is usually unlocked, was locked, and I didn’t want to make a big deal of finding the key, so we didn’t have particularly hot water, so the second part of the activity wasn’t so impressive, but the Dad in Charge was pretty good about talking with the kids about how molecules moving is what causes the food coloring to disperse.
Station 2: Penny challenge
Materials:
pitcher
2 Small-ish glasses.
1 – 2 dozen pennies or other coins.
Water with food coloring (the food coloring is just to make the effect more visible)
Liquid soap
Medicine dropper
Baking sheet with edges or other tray (to contain spills)
Fill the glass with water. Then add pennies one by one. After adding one or two, ask the boys what they think will happen. Observe the strange bulge that grows as pennies are added, until too many pennies are added.
Repeat with a couple squirts of liquid soap added to the water.
Second activity: how many drops of water will fit on the top of a coin? Take the medicine dropper to add drops, one by one, onto a coin, and watch the effect.
The principles:
Water molecules cling to each other in all directions. At the surface, there are water molecules to cling to from the sides and from below, but no molecules to cling to above, so the molecules form a strong, stretchy skin across the water’s surface. This attraction at the water’s surface is called surface tension. After enough pennies are added, the water molecules are pushed upwards, which breaks some of these bonds so that the water spills over.
Soap weakens the surface tension – the pull of the water molecules is weaker.
Station 3: Water ball games
Waxed paper
Marker/Sharpie
Medicine dropper
Straws
Glass with water with food coloring
Process:
Draw two “tracks” on the waxed paper with a start and finish line. Using the dropper, place same-sized water ball droplets at the starting line. Two racers try to blow the balls to the finish line.
If the ball comes apart, push it together with the straw.
Alternate race: use a wet toothpick to pull the ball along.
Alternate activity: place dots of water and use a toothpick or straw to combine them together.
Commentary: this one wasn’t as effective; the kids were done with it very quickly.
Station 4: Volcano!
Materials:
Small containers (in this case, old film containers; I also tried it with a small tomato sauce can)
Baking soda
¼ cup water
¼ cup vinegar
2 Tbps. dishwashing liquid
Cup
Baking sheet with edges or other tray
Process:
Mix the water, vinegar, and dishwashing liquid in a large cup. Place 1 – 2 tsp. baking soda in the container. Pour the vinegar mixture into the can until the “lava” starts to flow. Note that the vinegar mixture is enough for multiple “eruptions.” Allow boys to take turns adding the baking soda, pouring in the vinegar, and watching the eruption. Demonstrate the principle with just baking soda & vinegar. What’s the right amount of baking soda to get the most the most dramatic effect?
The principle: baking soda + vinegar combines and creates carbon dioxide gas through a chemical reaction.
Commentary: I didn’t watch the Dad in Charge very closely to see how well it worked out or how engaged the boys were with this one.
The bottom line
It all felt very . . . experimental. And, yes, it would have been nice to have had a “pro” doing this, with the spashy mad-science type demonstrations that an actual outlay of money would buy. It’s also my understanding that larger packs, where more time is taken up with announcements and “business” and skits and pack cheers and so forth, don’t even necessarily have planned activities at pack meetings, but with a smaller pack it wouldn’t work that way.
In the end, it was . . . adequate. And that’s probably good enough.
Image: https://commons.wikimedia.org/wiki/File%3ACub_Scouts_Earn_Geology_Badge_(8200193981).jpg; By U.S. Army Corps of Engineers Sacramento District (Cub Scouts Earn Geology Badge) [Public domain], via Wikimedia Commons