Ostara/Spring Equinox Crafts
Taken from Grimore of a Kitchen Witch
Ostara Seed Cards
These are a lovely idea for greetings cards, you could adapt them and use them for birthday cards too.
You will need:
Card or pre cut card templates
Envelopes
Seed packets
Glue (pva is best, not a glue gun as the heat can damage the seeds)
Pens
If using a plain sheet of card fold it over to make a card shape. Using the glue stick a seed packet to the front of the card.
Using pens of your choice write your message inside the card.
Ostara Tree
You will need
Several large twigs (use wind falls collected from the ground around the tree)
Florists foam
A flower pot
Paint
Decorations
Paint the flower pot with spring designs, be creative adding butterflies, eggs or flowers or just paint it a spring colour.
Fit a piece of florists foam into the flowerpot and then stick the twigs into the foam so that it forms the shape of a tree.
Then decorate! Hang painted eggs or chocolate treats onto the branches.
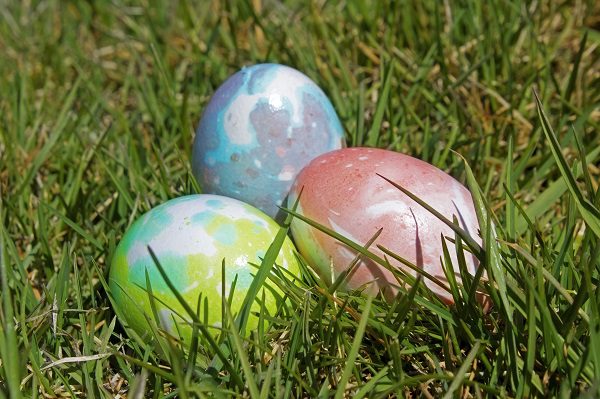
Home dyed eggs
Simple but very effective!
What you need
Eggs
A pan of water
Vinegar
Natural ingredients for making the colours
Start with your pan of boiling water with a teaspoon of vinegar added, make sure there is enough water in the pan to cover the eggs and it works best if you only boil 3 or 4 at a time.
Then carefully add your eggs to the water.
To colour the eggs add one of the following items, try different amounts to get different shades, but it will take about 20 minutes of simmering to get the colour to set into the shells.
Red/Pink – Paprika, pomegranate or cranberry juice, beets or red onion skins
Purple – Grape juice
Orange – onion skins
Yellow – lemon or orange peel, carrots or cumin
Gold – curry powder or turmeric
Brown – coffee or black walnut shells
Green – spinach
Blue – blueberries or red cabbage
Yellow/green – apple peel
Once they have achieved the colour you want carefully remove them from the pan and place them on a paper towel to dry.
Keep the eggs in the fridge until you want to use them for your egg hunt. You can also paint the egg shells with a little glue and sprinkle with glitter too.
Drawing a design on the egg shell before you dye it with a wax crayon also creates a good effect.
Crystal Eggs
These are wonderful and great fun for the children (and the adults).
What you need
1 cup plain (all purpose flour)
½ cup salt
½ cup sand
1 cup used coffee grounds
¾ cup warm water
Small crystals or gems
Non stick cooking spray
Paint (acrylic works best)
Mix together the flour, salt, sand and coffee. Gradually add the water and knead until you have a thick dough (it will obviously feel a bit gritty).
Select a crystal and spray it with non stick cooking oil and put it in the centre of a small ball of the dough. Shape the dough around the crystal and mould it into an egg shape.
Bake the eggs at 350 degrees for about 15 minutes and then allow to cool.
Once they are cool they should feel and look like a rock, if you wish you can paint them in different colours.
The eggs can be used in an egg hunt or just given out for cracking open to reveal the hidden crystal.
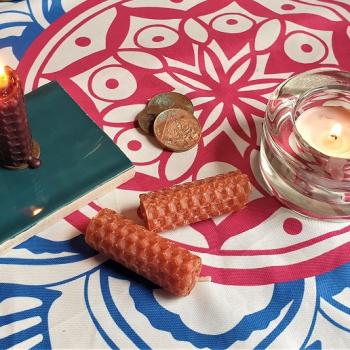
Eggshell Candles
What you need
Uncooked eggs
Wax beads
Birthday candles
Knife
Make a small hole in the top (the pointed end) of the egg, chip away careful to make a small hole so that the raw egg inside can be tipped out. Chip away about ¼ of the egg shell.
Rinse the inside of the egg shell very carefully with warm water, and set them to dry.
Fill the shell ½ to ¾ full with wax beads, insert a birthday candle into the centre ( you might need to trim the bottom of the birthday candle slightly to make it the right height).
Sit in an egg cup or candle holder.
Eggshell plant pots
You will need
Eggs
Egg carton
Fertiliser/soil
Cotton wool balls
Knife
Scissors
Plastic spoons
Seeds
Make a small hole in the top (pointed end) of the egg shell and chip away about ¼ of the shell and allow the raw egg to pour out.
Wash the shell carefully in warm water and set to dry.
If you want to paint a design on your egg shell do so at this point, or draw a smiley face.
Put the egg shells in the egg carton with the hole at the top. Place a cotton wool ball into each eggshell. Spoon in fertiliser to each egg shell. Sprinkle your seeds onto the soil, then sprinkle on a small amount of water, adding a trickle of water each day to keep the soil moist. Leave the egg planters in their carton on a sunny windowsill.
Once the seedlings are too big for the egg shells, crack the bottom of each shell so that the roots can grow through and plant in the garden or a plant pot, complete with the egg shell as this will break down and provide nutrients to the soil.